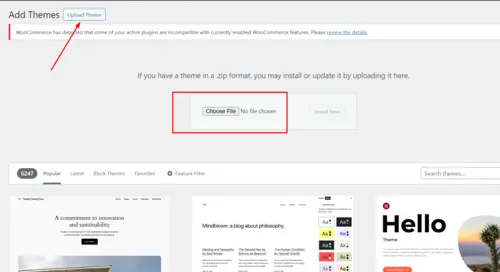
How to Install a WordPress Theme via Dashboard Introduction: WordPress offers a diverse range of themes that allow you to personalize the appearance and functionality of your website. Installing a new theme through the WordPress dashboard is a straightforward process that doesn’t require any technical expertise. In this guide, we’ll walk you through the step-by-step process of installing a WordPress theme directly from your website’s dashboard.
Step 1: Access Your WordPress Dashboard Log in to your WordPress website using your administrator credentials. Once logged in, you’ll be taken to the WordPress dashboard, where you can manage various aspects of your site.
Step 2: Navigate to the Themes Section In the WordPress dashboard, locate and click on “Appearance” in the left-hand sidebar menu. This will expand a submenu. From the submenu, click on “Themes” to access the themes management page.
Step 3: Click on “Add New” On the Themes page, you’ll see your currently installed themes. To add a new theme, click on the “Add New” button at the top of the page. This will take you to the Add Themes screen, where you can browse and search for themes.
Step 4: Browse or Search for a Theme You can explore the featured, popular, or latest themes showcased on the Add Themes screen. Alternatively, use the search bar to find a specific theme by name, keyword, or feature. You can also filter themes by criteria such as layout, features, and subject.
Step 5: Preview and Install Once you’ve found a theme you like, hover over its thumbnail to reveal the “Preview” and “Install” buttons. Clicking on “Preview” allows you to see how your website will look with the theme applied. If you’re satisfied, click on “Install” to proceed with the installation.
Step 6: Activate the Theme After the theme is successfully installed, the “Install” button will change to “Activate.” Click on the “Activate” button to make the newly installed theme


Recent Comments